Peacock Holographic powder review!

I’m back with my faaaaavourite gel powder yet!!!! Once again BeautyBigBang have absolutely hit the nail on the head with their J2952-9A peacock holographic nail powder! This is the last product I have to review from BeautyBigBang and honestly this is the best one out of the three!

After applying my base coat gel polish and two gel layers of a purple polish, with curing in between each layer, it was time to use the powder. The pot the powder comes in had a seal (like most powders do) and once I peeled it off I could already tell how stunning this was going to be. Despite only looking to have a small amount of powder in the pot, there’s no need to worry as, as per usual, a little goes a long way!

With a clean sponge tool I rubbed a small amount of the holographic powder over my nails and it took instantly creating this gorgeous finish. With a layer of top coat gel (and a curing session after this!) the sparkle of my nails really came to effect.

As with many holographic powders, the effect doesn’t always appear that striking under natural light, the same with this powder. However, once you get even a small amount of direct light on your nails, the holographic effect really shows up. On the right is a picture without flash (which is still gorgeous if you ask me), and the left is with flash.

Overall I am super impressed with the finish of this powder as I have been with the other BeautyBigBang products. I guess the way to any girl’s heart is through a stunning sparkly manicure as I can guarantee I’ll be using this powder as much as I can (and will definitely be repurchasing it once I’ve run out!). I’m so thrilled with the outcome that I want everyone to try it, and you can do so with a bit of extra money off too using my discount code BARET10 !! Why not make the most of the 10% off by looking at my other reviews on this blog and possibly purchasing those products too, you wont be disappointed!

I honestly cannot wait to try more of the products from BeautyBigBang and you can be sure that you’ll all be the first to hear my thoughts. Thank you very much for reading, now enjoy some different angles of this stunning mani! -Lia.


Beauty Big Bang Stamping plate set review!

So I’ve had another fun set of products to test and review this week from BeautyBigBang which is their 34412 nail stencil stamping plates! In this set, I received 10 of the metal stamping plates (plates B08, B10, B14-18, B22, B26 and B29), a scraper and a stamper tool. All of the plates arrived properly packaged in their own individual packets with a blue cover protecting the image plates as can be seen in the pictures below! (Beware however if you do buy these plates that when you peel off the blue protective cover that you are extremely careful as the edges of these plates are super sharp!! I managed to slice my finger open as I clumsily let it slide through my finger!)

Each plate had varying designs on and I found it so difficult to pick something to do on my nails but I eventually decided to be quite experimental and do some reverse stamping and see how it turned out! (Its safe to say I need more practise stamping nail art as I usually freehand! Although my first attempt wasn’t too shabby if I do say so myself!)

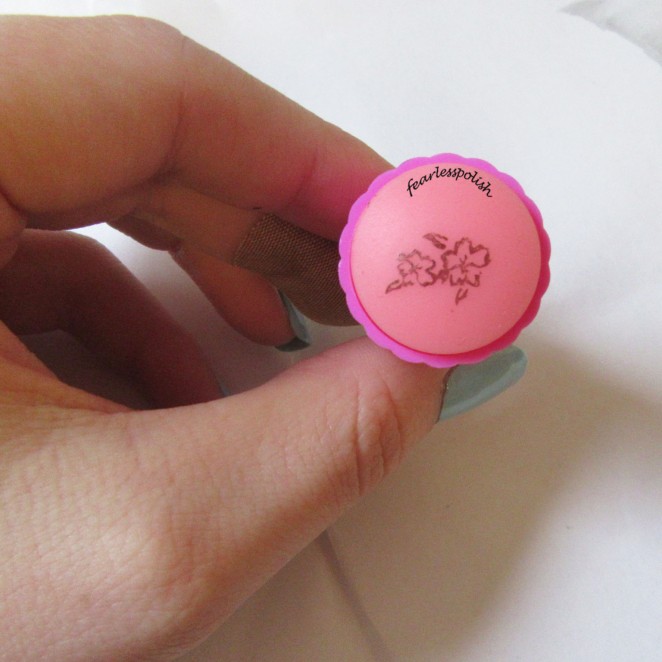
After painting my nails with two coats of Essie Blue La-La and allowing this to dry fully, I put a small amount of Essie Licorice (black) on to the floral image on the BeautyBigBang plate number B26. Using the scraper, I wiped this across the whole image to remove the excess polish and distribute it into the grooves. Then using the stamper, I rolled this over the image to pick up the black polish which you can see in the image below. stamper

Although not being completely black, I feel as though this picked up the image clearly and I appreciate that other black polishes may have worked more effectively which is something I will have to test out in the future! Then using Essie B’aha Moment and Vibrant Vibes, I filled in the flowers ensuring to keep within the black lines (this is where the name reverse stamping comes from!!). Once this had been on the stamper for about a minute, it was easy to see it beginning to dry which is when I then placed it over a section of my nail and rolled it on. The image transferred perfectly fine (I smudged a few by sliding the stamper over my nails on a few occasions, hence my need for more practise!) and the colours were completely visible.

Between every stamp, I took a cotton pad covered in polish remover and wiped the image plate, stamper and scraper to remove any currently drying nail polish and allow for a fresh new design to be picked up. I repeated these steps until my nails were completely covered with the flowers and one with ‘Aloha!’ on it as I though the flowers looks quite tropical and fit with the theme (this was also from the same plate).

Once I had finished, I applied a top coat to all of my nails which is where I found the design to smear slightly which never tends to happen when I freehand my designs. Therefore, I would recommend being very light handed with top coat to prevent smudging your pretty new manicure!

Overall, my experiences with these image plates was very positive. The whole bundle was extremely affordable and worked perfectly fine with every necessary tool required included in the bundle. This would be a perfect set to being with if you’re new to nail stamping.

As an extra treat, I have been given a 10% off discount code for you all to enjoy, whether you buy this bundle or something completely different from their website! (they have tonnes of cool items that I’m dying to try!) So why not treat yourself using the code BARET10 at the checkout!? Thank you so much for reading, keep an eye out for my next reviews of products coming in the next few weeks!


Testing and review of Rose Gold Chrome Powder!

So… it’s definitely been a while since I’ve blogged about my nail adventures but I’m back with full force and some very exciting opportunities! This week I’ve had the privilege of testing out the BeautyBigBang J2431Rose Gold Chrome Powder (for gel nails!! Click on the link to have a browse through their website!)

So as mentioned above, this powder is technically made for use with gel nail polish however, I have not tried it with regular nail polish which is something I will have to attempt one day. If you aren’t familiar with the process of doing gel nails at home, I will explain the steps I take to do my gel nails at home.

After buffing my nail surface, pushing back my cuticles and shaping my nails with a nail file, I applied one thin layer of gel base coat to protect my natural nails from staining that might be caused by the gel polish. I then cure this in my 36 watt gel curing lamp (bought from Ebay or Amazon as a Christmas present) for 2 minutes as this is the main time setting on the lamp. Once this has cured, I applied one thin layer of a gel colour. For these rose gold nails, I used a letterbox red colour in the hope that this would coincide well with the colour of the powder. Once this layer had cured for another 2 minutes, I applied a second layer of red polish and cured again.

I am aware that many people apply a no-wipe gel topcoat before applying any type of nail powder however, with my last manicure, I found this didn’t work perfectly well possibly due to my top coat not having a tacky or sticky layer. So as an attempt, I began rubbing the powder on to my nails using what I can only describe as an eyeshadow sponge. Immediately the powder took to my nails and covered the whole surface seamlessly with a very small amount of powder and might I add, looked incredible! Obviously, this process is rather messy due to the powder being loose, therefore to clean up any excess on the sides of my nail, I used a cotton pad and wiped this over my nail. Once all of my nails were covered with the powder, I then applied the topcoat and cured for a final 2 minutes which produced the final product with a beautiful shine.

I can wholeheartedly say with no bias whatsoever, that this is my favourite chrome powder I have used so far. Firstly the sheer amount of powder you actually get in a pot is incredible and for such an affordable price too! Not only this, but the powder is so fine and pigmented that you need the tiniest amount which in itself goes a long way! My first impressions of this powder were way more than what I expected and I am thrilled to be able to experiment with this powder more and even share its quality with family and friends!

So far there are no changes to the finish and lasting of the powder but if anything changes, I will make another blog post commenting on the progress of my gels.

I would definitely recommend this powder to anyone, both professional or beginner as I have only done gel nails once before this manicure and for a beginner, I have found this powder to be SO easy to use which is another exciting benefit. If you want to achieve a manicure that looks like it has just been done professionally in a salon, then I would absolutely recommend this powder (plus you can use it in the comfort of your own home!)

If you have any questions about the powder then please do ask me and I will respond as honestly as possible! As an extra treat, I have been given a 10% off discount code for you all to enjoy, whether you buy this powder or something completely different from their website! (they have tonnes of cool items that I’m dying to try!) So why not treat yourself? Thank you so much for reading, keep an eye out for my next reviews of products coming in the next few weeks!

Product reviews and 10% off!

So I’ve been MIA for quite a while due to starting university and having very little time to blog 😦 However, I have received a great opportunity to test out some products from Beauty Big Bang which I am so excited about! In doing this, I have been given a discount code for anyone to use so you can take some money off of your order. All you have to do is enter BARET10 at the checkout! Just click the link to shop!>> Beauty Big Bang

When my order arrives I will be doing 3 separate reviews on my blog and instagram so you can see if you like the products and would like to try them yourselves! I’m so excited for this opportunity and hope you all like this, I am going to be 100% honest as I don’t see the point in lying about quality. Baring in mind, I am no way professional so it may take me a few attempts to get things right (I will mention this in my review so you all know my true opinion!)

I’ll see you for the review in the next few weeks! Happy Shopping!

-LiaBARET10